Automating Jekyll with Terraform: A Serverless Approach to Static Site Hosting on Azure
My plan is to create a private repository on GitHub to be the source of all of the content for my blog posts. This is where I will write and where I will maintain the original copy of every blog post I make. I can then distribute the blog posts to any online forum that I choose (e.g., Medium, etc.) but I will publish the original on my official website and distribute to others.
When it comes to setting up and automating a personal blog, the approach I landed on was to use Terraform to provision infrastructure and GitHub Actions to automate the build process. I know you’re all shocked. In this article, I’ll walk you through how I use Terraform to provision an Azure Storage account, automate Jekyll builds using GitHub Actions, and host the site as a static website on Azure Blob Storage.
The twist? I keep all my content on a private GitHub repository to prevent scraping of my markdown files. Let’s dive into the steps!
Terraform the Environment
To begin, I keep my Terraform variables simple. However, the custom domain was a bit tricky because of the manual DNS verification process with GoDaddy. In the future, I might move to a DNS provider with a Terraform provider for easier management.
variable "location" {
  type = string
}
variable "application_name" {
  type = string
}
variable "environment_name" {
  type = string
}
variable "custom_domain" {
  type    = string
  default = null
}
For hosting, I chose Azure Blob Storage because it’s fully “serverless.” While GZRS-RA (Geo-Redundant Storage with Read Access) might seem like overkill for a small blog, I’d rather be safe than sorry. At some point, I might add Azure Front Door for automatic failover, but since it costs $35/month, I’m keeping things lean for now.
resource "azurerm_storage_account" "main" {
  name                       = "st${random_string.main.result}"
  resource_group_name        = azurerm_resource_group.main.name
  location                   = azurerm_resource_group.main.location
  account_tier               = "Standard"
  account_replication_type   = "RAGZRS"
  https_traffic_only_enabled = false

  dynamic "custom_domain" {
    for_each = var.custom_domain != null ? [0] : []

    content {
      name          = var.custom_domain
      use_subdomain = false
    }
  }

  static_website {
    index_document     = "index.html"
    error_404_document = "404.html"
  }
}
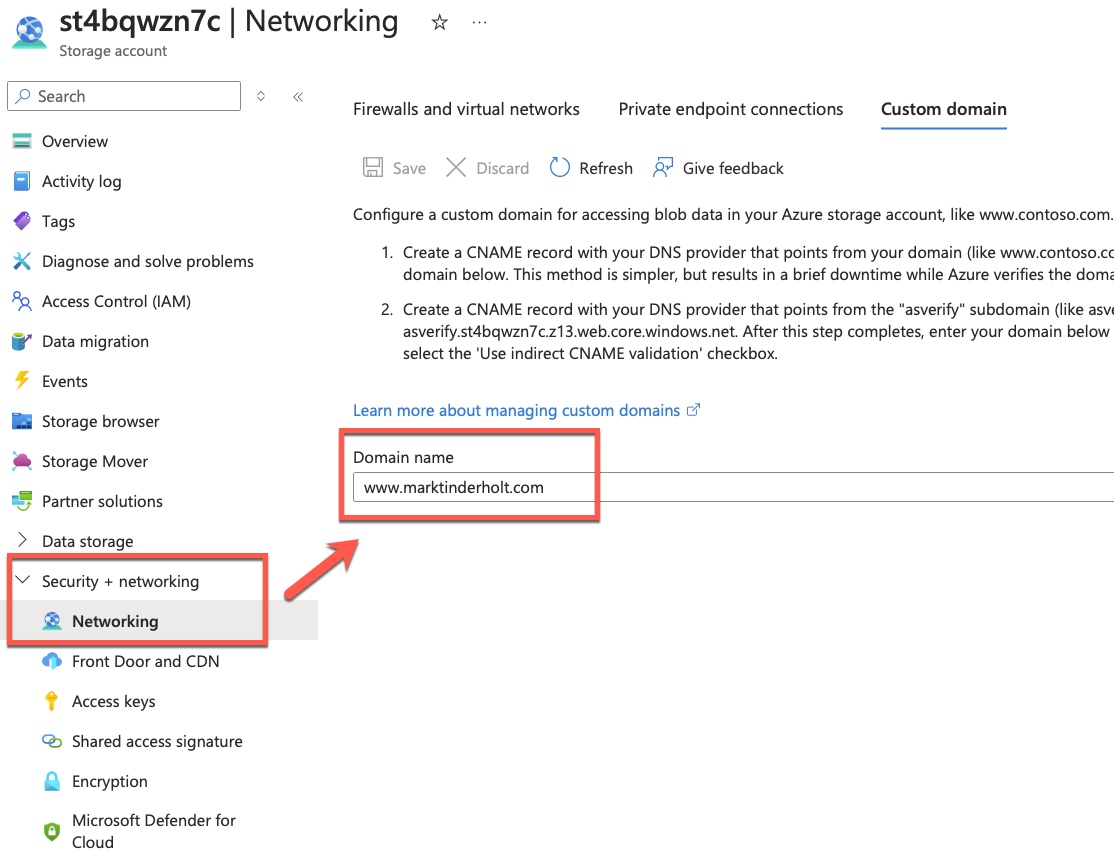
Here, the custom domain is optional. I manually created a CNAME in GoDaddy to point to the storage account. I also set up DNS verification for the custom domain:
| Hostname | CNAME Record |
|---|---|
| www | st4bqwzn7c.z13.web.core.windows.net |
| asverify | asverify.st4bqwzn7c.z13.web.core.windows.net |
Use Jekyll to Build the Site
To generate the site content, I use Jekyll. After creating a new site structure, it’s as simple as adding content to the _posts directory and building the site.
jekyll new my-awesome-site
Then, build the site:
bundle exec jekyll build
Each post starts with a simple text header in YAML format:
---
layout: post
title: "Foobar"
date: 2024-10-22 10:59:14 -0500
categories: ["Infrastructure-as-Code", "Terraform", "Azure", "Cloud"]
tags: ["Blogging"]
---
Once that is done you just throw a bunch of markdown in and you’re all set.
Change your Jekyll Theme
I found YAT (Yet Another Theme) on Jekyll Themes. It has a clean design with layouts for archives, categories, and tags. I also customized it to include a public speaking engagement page using the about layout. This keeps everything organized and consistent for any static pages I need.
GitHub Action for Continuous Deployment
To streamline deployment, I use GitHub Actions for both Terraform and Jekyll automation. First, let’s look at the Terraform step.
      - id: apply
        name: Terraform Apply
        env:
          ARM_SUBSCRIPTION_ID: $
          ARM_TENANT_ID: $
          ARM_CLIENT_ID: $
          ARM_CLIENT_SECRET: $
          TF_VAR_application_name: $
          TF_VAR_environment_name: $
        working-directory: $
        run: |

          az login --service-principal -u $ARM_CLIENT_ID -p $ARM_CLIENT_SECRET --tenant $ARM_TENANT_ID

          terraform init \
            -backend-config="resource_group_name=$" \
            -backend-config="storage_account_name=$" \
            -backend-config="container_name=$" \
            -backend-config="key=$-$"

          terraform apply -var-file=./env/$.tfvars -auto-approve

          echo "storage_account_name=$(terraform output -raw storage_account_name)" >> "$GITHUB_OUTPUT"
This step initializes Terraform and applies the configuration, provisioning my Azure Storage account as a static website.
Building and Uploading the Site with Jekyll
After Terraform sets up the infrastructure, another job in the workflow builds the static site using Jekyll:
      - name: Set up Ruby
        uses: ruby/setup-ruby@v1
        with:
          ruby-version: 3.0 # You can specify a version compatible with your Jekyll setup

      - name: Install dependencies
        working-directory: $
        run: |
          gem install bundler
          bundle install

      - name: Build with Jekyll
        working-directory: $
        # Outputs to the './_site' directory by default
        run: bundle exec jekyll build
        env:
          JEKYLL_ENV: production
Once the site is built, I upload the static files to Azure Blob Storage:
      # Step 6: Upload the Jekyll site to Azure Blob Storage
      - name: Upload site to Azure Storage
        working-directory: $
        env:
          ARM_SUBSCRIPTION_ID: $
          ARM_TENANT_ID: $
          ARM_CLIENT_ID: $
          ARM_CLIENT_SECRET: $
          STORAGE_ACCOUNT_NAME: $
        run: |

          az login --service-principal -u $ARM_CLIENT_ID -p $ARM_CLIENT_SECRET --tenant $ARM_TENANT_ID

          az storage blob upload-batch \
            --account-name $STORAGE_ACCOUNT_NAME \
            --destination '$web' \
            --source './_site' \
            --pattern '*' \
            --overwrite
Continuous Deployment with GitHub Actions
The entire deployment process is triggered by a push to the main branch:
on:
  push:
    branches:
      - main
    paths:
      - "sites/marktinderholt.com/**"
Every time I push changes to my content repository, GitHub Actions automatically provisions the infrastructure (if needed), builds the site using Jekyll, and uploads the static files to Azure Blob Storage. It’s a fully automated, scalable workflow for static site deployment.
The Pull Request Process
With this trigger in place, I can now create a feature branch for each blog post I’m working on, allowing me to control when each post gets merged by following a solid GitFlow process.
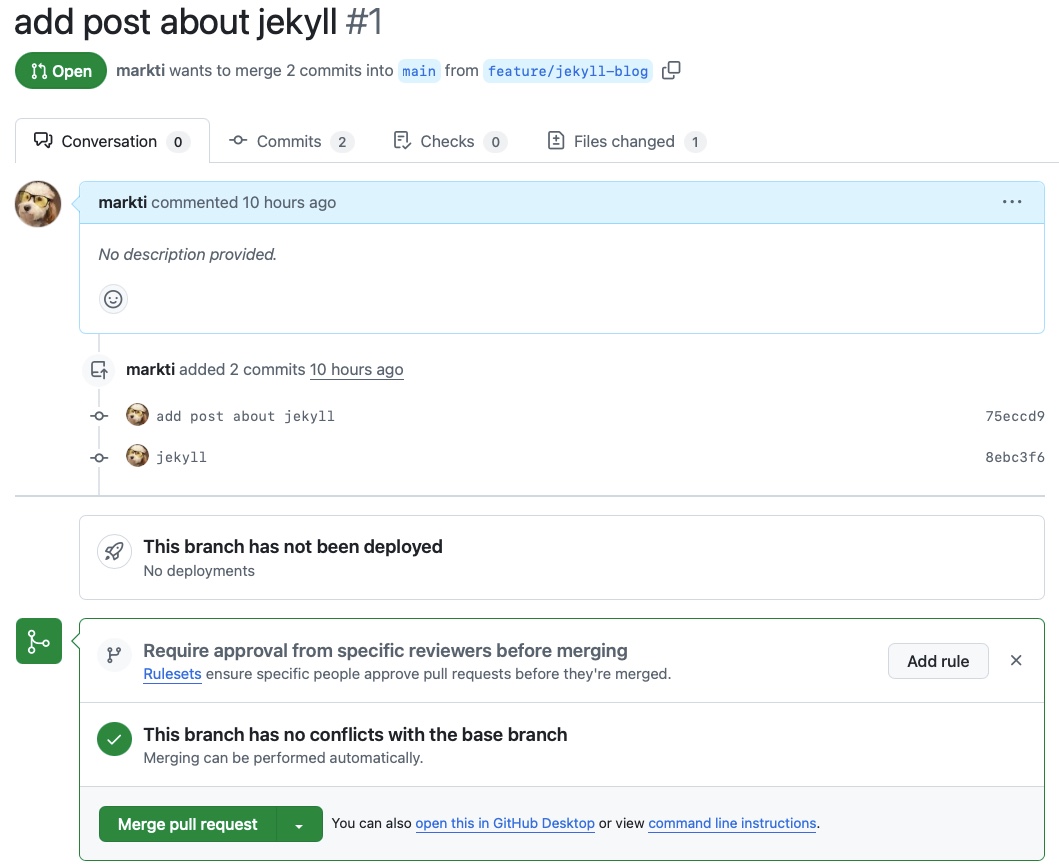
We’re getting a bit meta here, but the screenshot below shows the pull request (PR) for this very blog post.
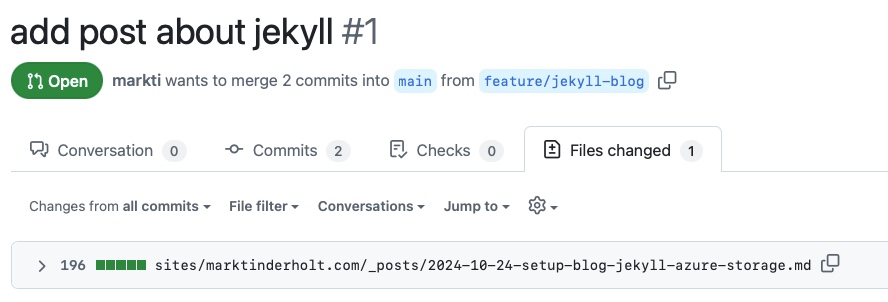
As you can see, only one post is being updated. Once I approve the PR and merge it into the main branch, my GitHub Actions workflow will automatically build the site and publish it to Azure Blob Storage.
In the GitHub Actions workflow, you can observe the clear dependency between the Terraform Apply step (which will soon become largely obsolete) and the Jekyll publishing step. I output the storage account name from Terraform and pass it to the Jekyll publish step to ensure there’s no need for hardcoded values, keeping everything dynamic.
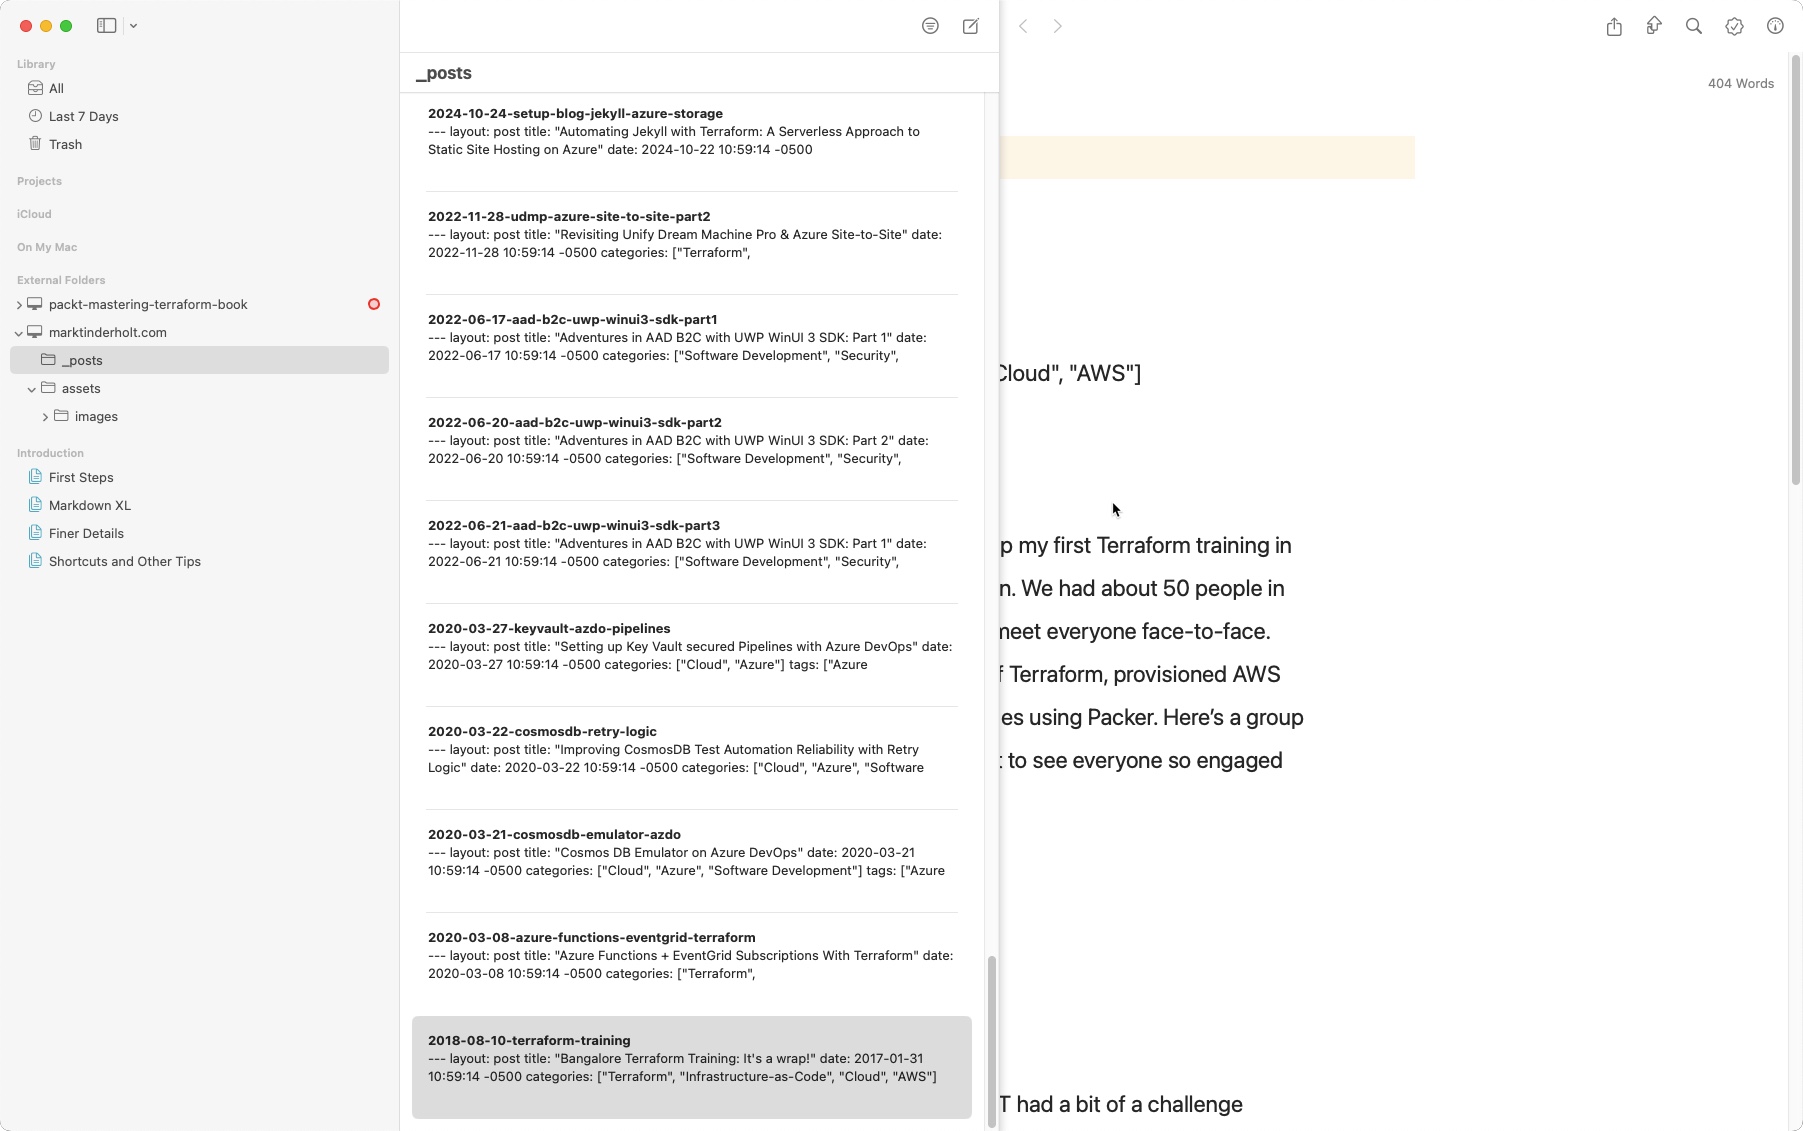
Managing Content
All of the posts are stored as markdown files in the folder _posts within the root directory of the site. I have organized my sites into a folder called sites. I plan on hosting MarkTinderholt.com and AzureTerraformer.com from the same GitHub repo. I might split them up in the future but for now that’s how it’ll be.
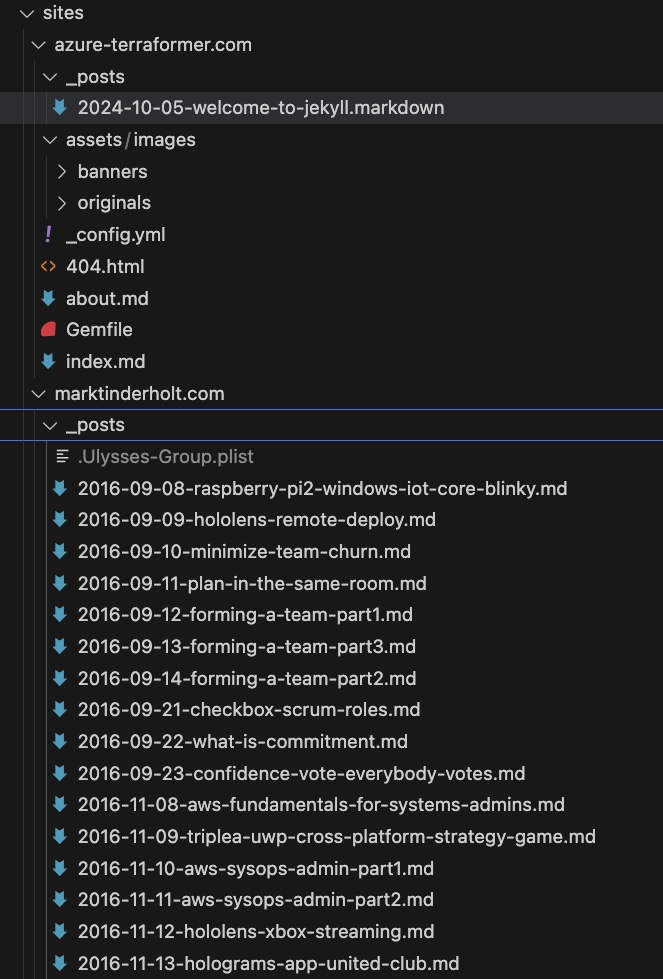
The posts unfortunately are all in one big folder. So if you’re like me and you’ve been blogging for a long time, this folder will get absolutely YUGE. Not in terms of number of megabytes but in terms of the sheer volume of individual files.
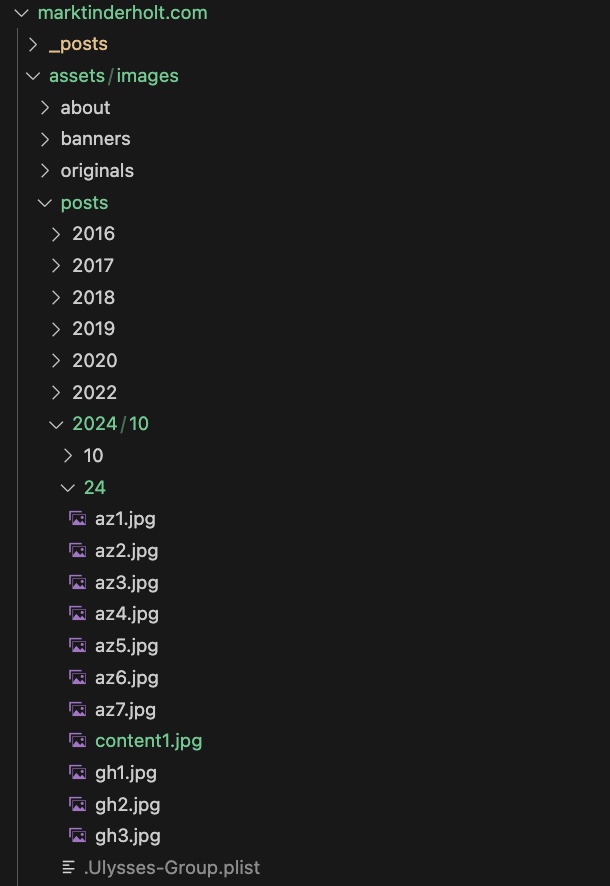
I organize photos under a different folder called assets/images. I have a dedicated folder for images for posts within this directory and within this directory I organize the photos into a time-based folder structure for YYYY/MM/dd.
I can even use my favorite writing app–in lieu of Visual Studio Code–called Ulysses to do my writing. However, I still use Visual Studio Code to manage the git operations.
Operations
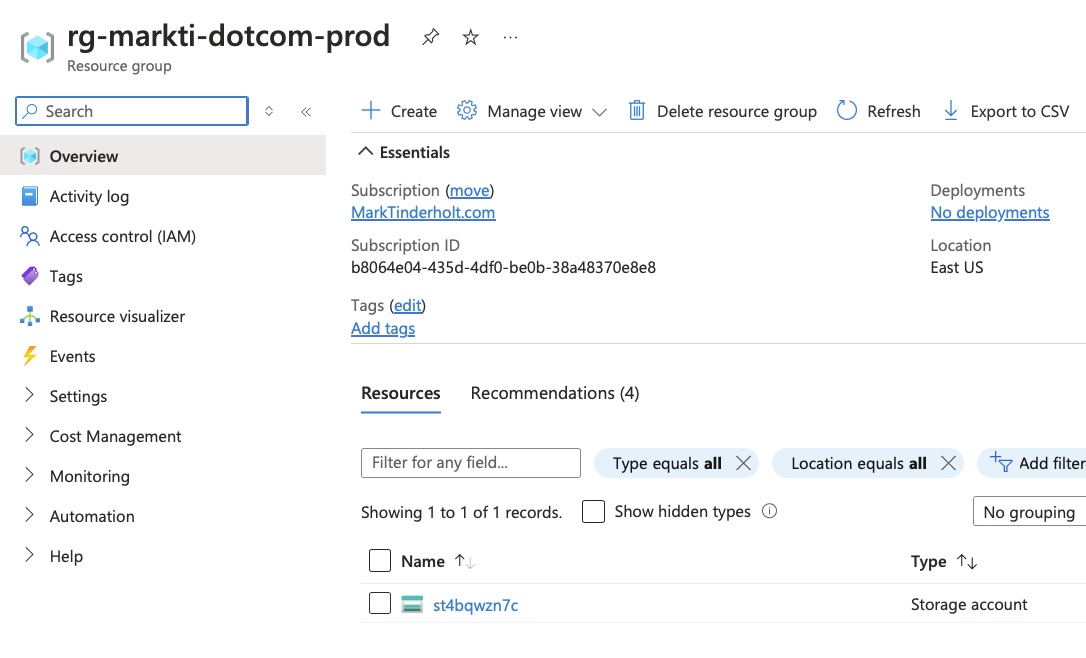
Operationally, I organize each Public Web Site into its own Resource Group. There’s no cost fo an Azure Resource Group, so why not?

Inside the Resource Group is just an Azure Storage Account.
The custom domain is setup under the “Networking” slice.
From a monitoring standpoint, I get a nice dashboard out of the box which includes the key metrics that will drive my hosting cost: Storage Transactions and Egress. This is accessible from the “Insights” slice under “Monitoring”.
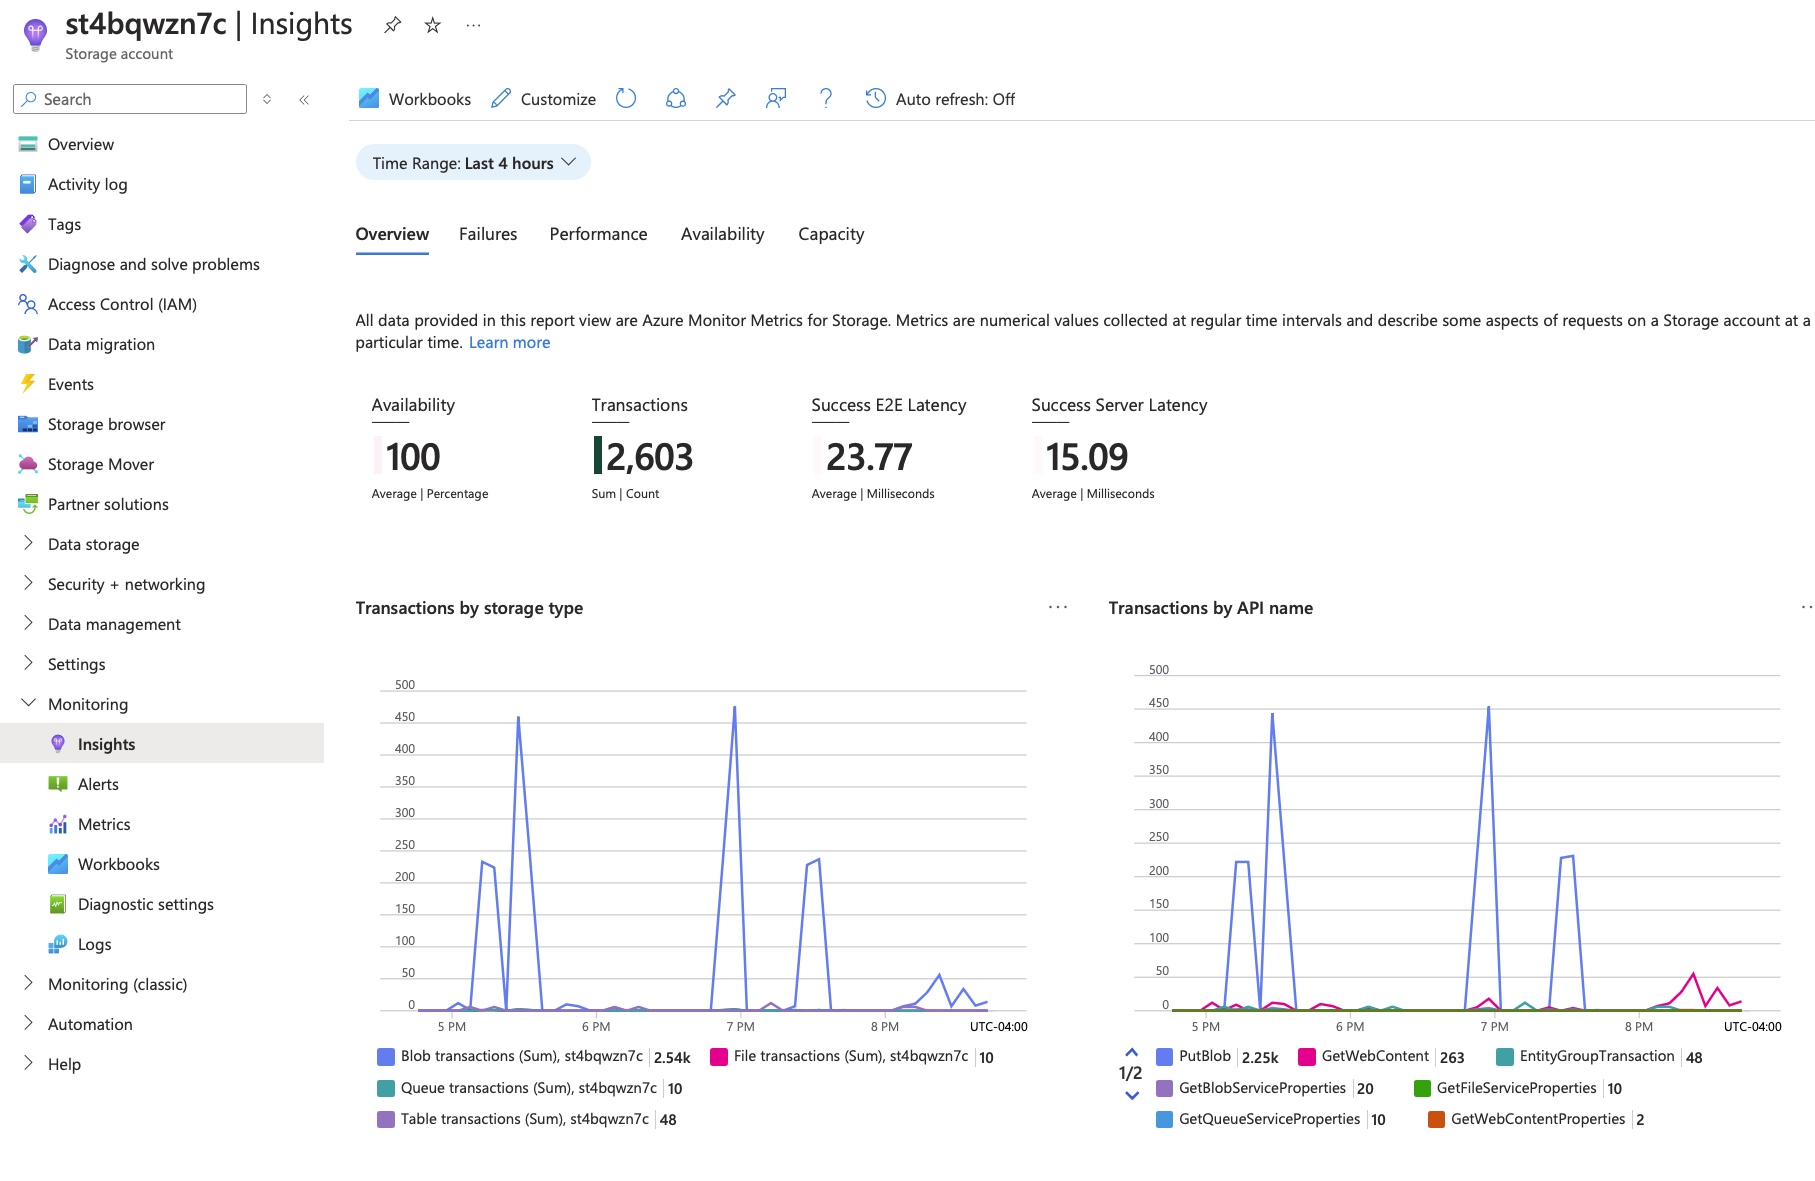
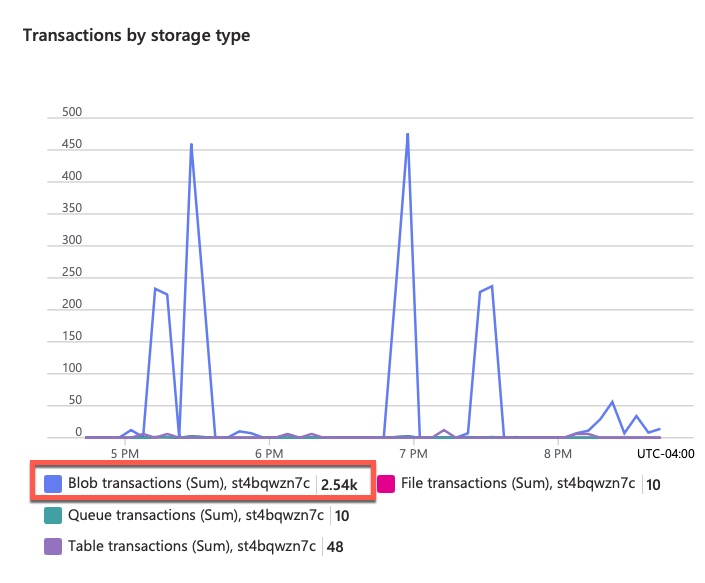
The graphs I pay most attention to are Transactions. This tells me how often requests are made for the content hosted on my blog. There are two views of the transactions. One related to the type of storage. This is a pretty good aggregate view. Azure Storage supports several types of storage but the only one my blog will be using is “Blob”.
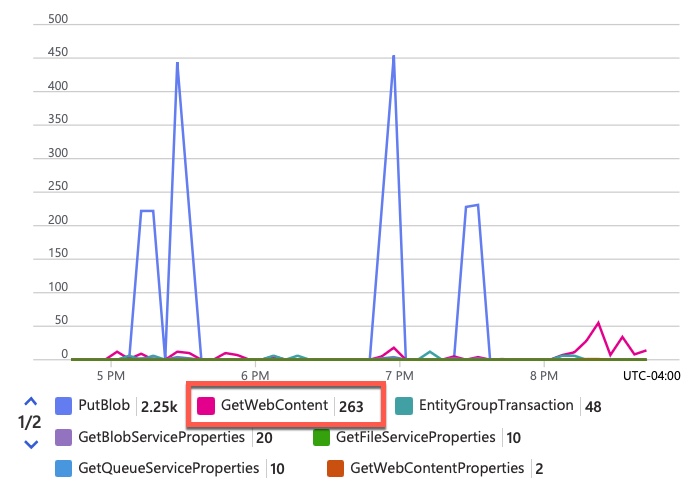
A more detailed view of this data looks at the actual API operation. This helps me differentiate between me making updates (e.g., “PubBlob”) and my actual blog readers (e.g., “GetWebContent”).
Lastly, and probably the biggest cost driver is Egress.
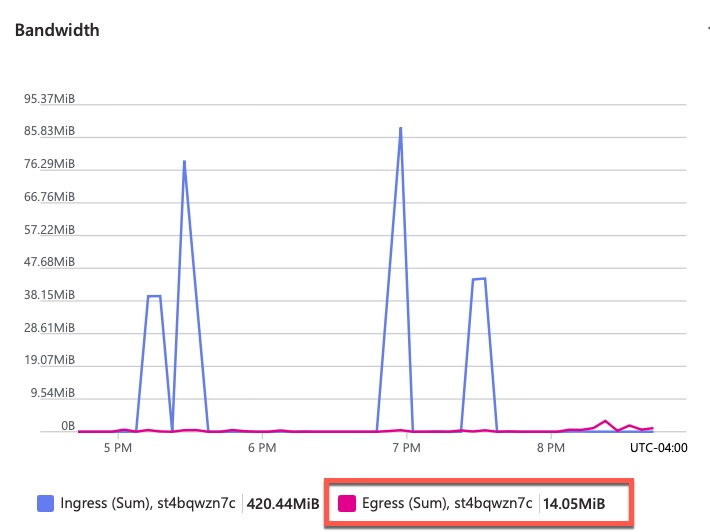
Text is pretty cheap but I am a pretty visual person so I host a lot of images and such which will very likely increase my costs.
Conclusion
By combining the power of Terraform, Jekyll, and GitHub Actions, I’ve built an efficient, automated process to manage and publish my blog content on Azure Blob Storage. The process is entirely serverless and cost-effective, ensuring that my site stays online with minimal manual intervention. Now, I just need a way to convert my Jekyll-based markdown posts into a REST API call to Medium to automate the publishing of the article to there and other places.