Using Terraform to Provision Microservices with Azure API Management Backed by Azure Functions
At home, I use Ubiquiti network equipment. My main router / firewall is a DreamMachine Pro. It’s relatively inexpensive, feature rich and easy to use. I wanted to connect my local network to my Azure environment so that I didn’t have to open up my Azure environment with too many PIPs so I thought I would setup a Site-to-Site VPN and do it with my favorite automation tool: Terraform.
I posted all my code and a comprehensive readme to a repository on GitHub that can be found here.
Terraform Overview
I use the follow Terraform resources:
- random_string
- azurerm_resource_group
- azurerm_virtual_network
- azurerm_subnet
- azurerm_public_ip
- azurerm_virtual_network_gateway
- azurerm_virtual_network_gateway_connection
- azurerm_local_network_gateway
A Quick Note about Random Strings
In many situations, cloud services require globally unique names which makes it difficult to find a name using simple naming conventions. In addition, due to the nature of Terraform and the ability to spin up new environments dynamically it can be extremely convenient to build in random strings into your naming conventions so that you can perform testing and create / destroy environments in the same region without worrying about conflicts. That’s why you’ll see in my code the use of the 6 character random string in the names of all the resources.
Azure Setup
Virtual Network
This is simple, we want our on-premise network to talk to a network out in Azure. Therefore, we need a starting point where the traffic can come into Azure. This network can be the only network that our on-premise network talks to or it can be just the tip of the iceberg and we can use things like Virtual Network Peering or even Virtual Hubs and Virtual WAN to interconnect further and at a higher scale.
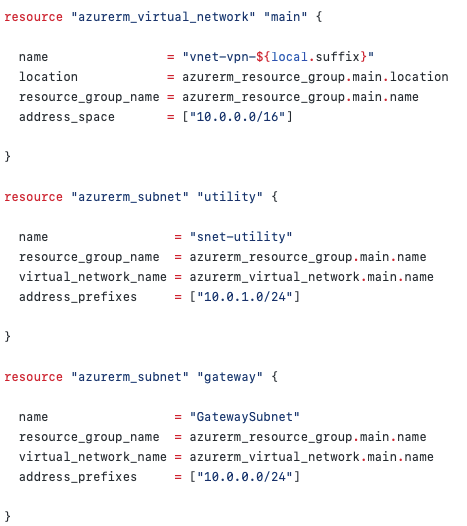
Terraform code that provisions the Virtual Network and two subnets
I like to provision subnets as separate resources. You can, of course, embed a block of subnets in the Vnet resource but this limits your options going forward as you cannot have some subnets provisioned as embedded subnet blocks within the Vnet resource and as separate stand-alone subnet resources. Therefore, for future flexibility, I always declare subnets separately.
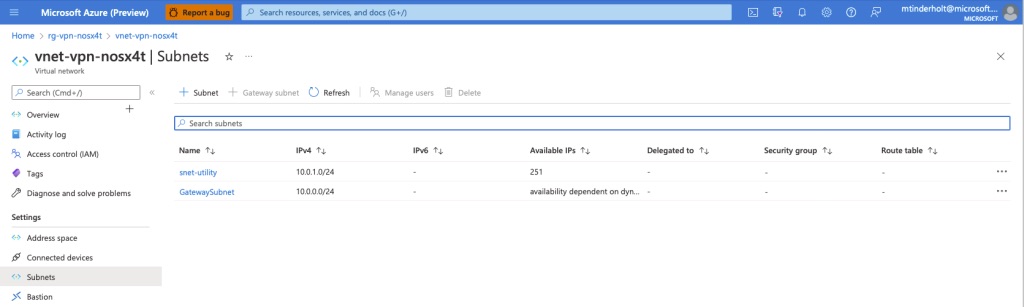
The Virtual Network’s Subnets in the Azure Portal
The GatewaySubnet is required by the Azure Virtual Network Gateway to work properly. It must be named exactly “GatewaySubnet”. The rest of your Virtual Network’s subnets can be named and organized however you please.
Virtual Network Gateway
The Virtual Network Gateway is what is used as the entryway for on-premise traffic to cross over into Azure.
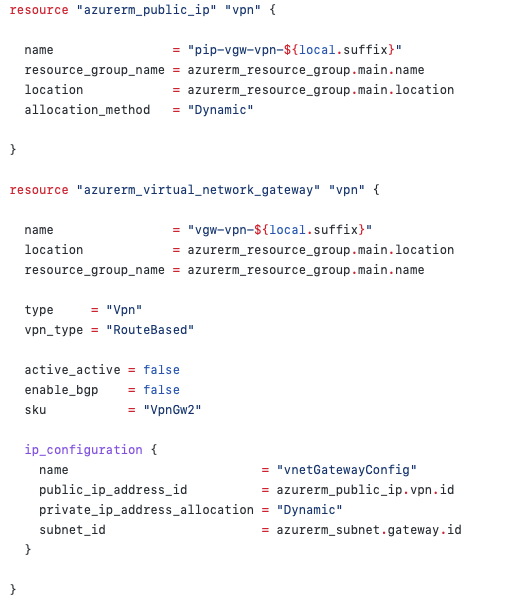
Terraform code that provisions the Virtual Network Gateway
You’ll notice that it needs to have a Public IP address. This is a bit of a no brainer as your on-premise network is going to need to connect to your VPN over the internet. Hence, an internet-addressable IP address is required.
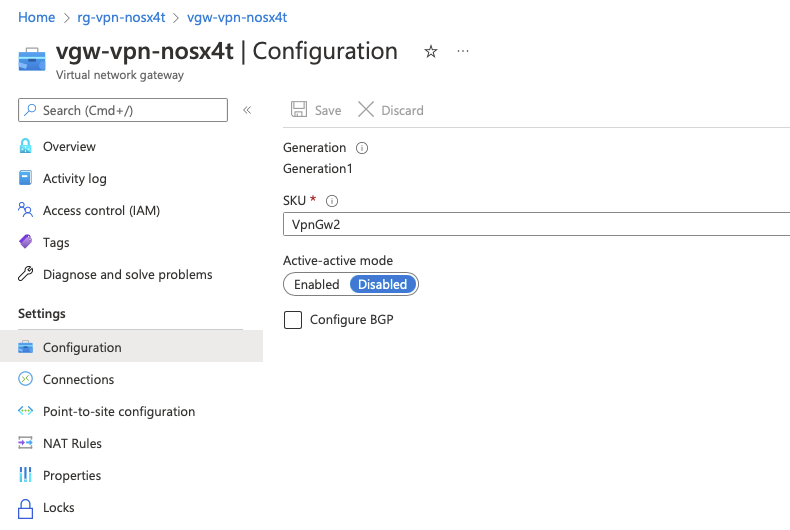
The Virtual Network Gateway’s configuration in the Azure Portal
I used this SKU because I do not have redundant internet connections at my place of residence. Most medium to large businesses will definitely have multiple internet connections that they can use to setup a VPN connection with High Availability.
Local Gateway
The Local Gateway is what represents the on-premise network to Azure. As a result, it’s configuration largely comprises details about how your on-premise network is setup.
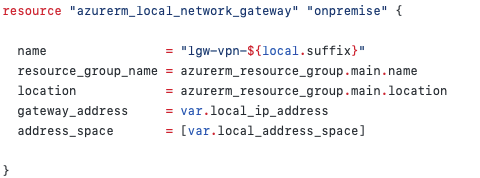
Terraform code that provisions a Local Gateway
The two most important pieces of information are your Public IP Address (this is provided by your Internet Service Provider) and the address space of your home network (this is controlled by your Dream Machine Pro) which will either be a 192.168.x.x or a 10.x.x.x network.
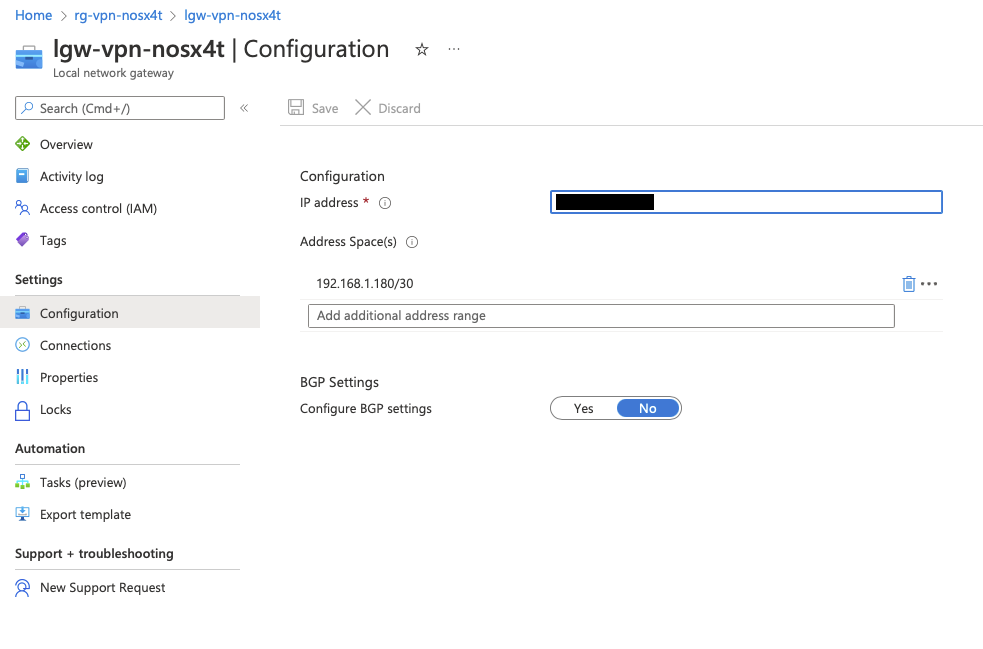
Local Gateway configuration in the Azure Portal
The Connection
The final setup of the Azure-side configuration is the VPN Connection. This represents how Azure will expect to communicate with your on-premise VPN device (our Dream Machine Pro).
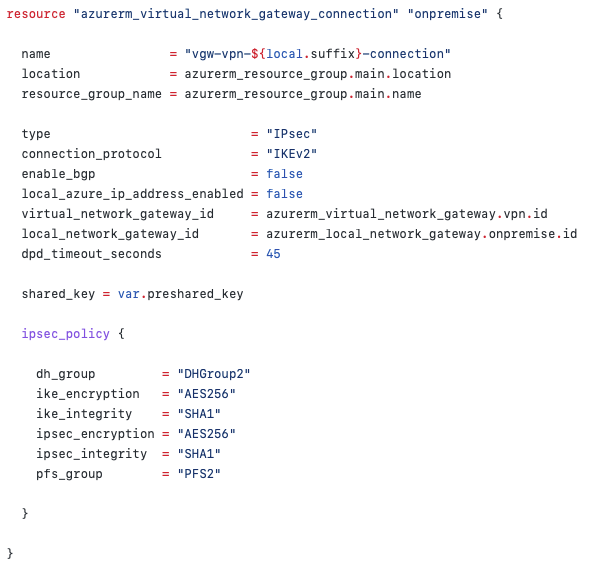
Terraform code that provisions a Virtual Network Gateway Connection
You will notice that in addition to connecting the dots between the Virtual Network Gateway and the Local Network Gateway, we are also configuring the IPSec policy which is used to tell Azure how to talk to the Dream Machine Pro.
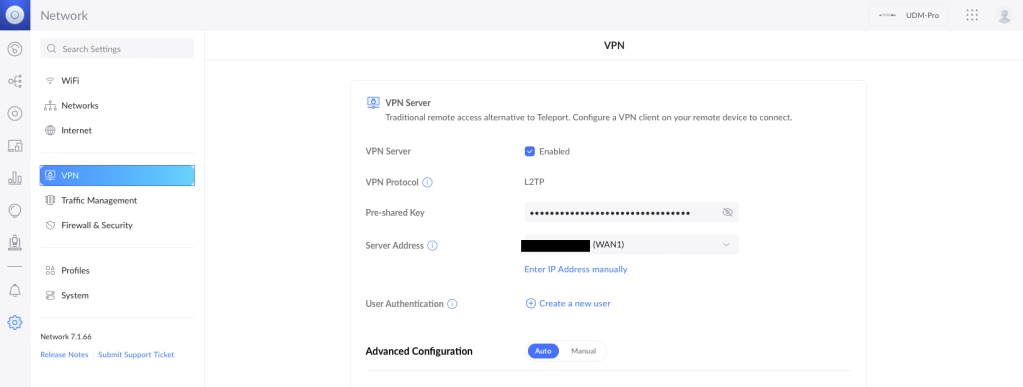
Dream Machine Pro Setup
In this section there will be no Terraform. Sorry, you will have to use your mouse and keyboard to configure your Dream Machine Pro not a handy dandy terraform apply.
Turn on the VPN
First things first, turn on your VPN Server! This will most likely be off by default. Also bear in mind that Ubiquiti makes updates to their software periodically so the menu navigation you see in my screenshots might change over time.
You will need to add that pre-shared key we used in the Azure setup.
Add a Site-to-Site VPN
Next you will need to register all that stuff you provisioned in Azure with your Dream Machine Pro so that it knows about it! A VPN is a relationship so like in any relationship it’s important that both parties talk to each other (for more relationship advice see my other blog).
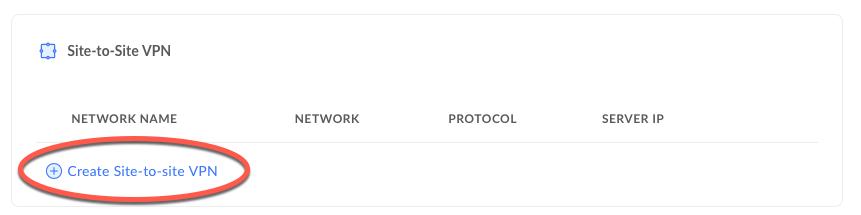
Click “Create Site-to-Site VPN”
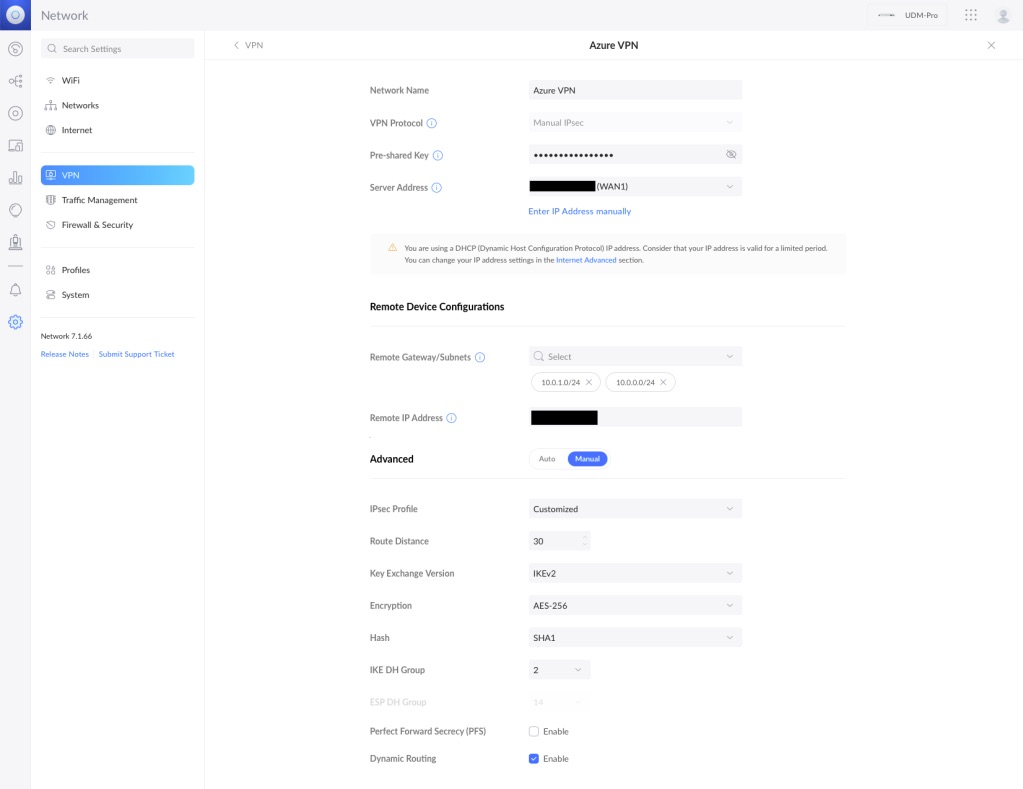
Site-to-Site VPN Configuration
You will need to add the pre-shared key again as well as configure the Azure Virtual Network address spaces that you want to talk to (e.g. 10.0.1.0/24 and 10.0.0.0/24).
IPSec Profile: Customized
Route Distance: 30
Key Exchange Version: IKEv2
Encryption: AES-256
IKE DH Group: 2
Perfect Forward Secrecy (PFS): Disabled
Dynamic Routing: Enabled
If you haven’t been paying attention, you will be surprised to notice that these settings align with how we configured Azure using our Terraform code.
…and we’re done!
Finally, we get to check the status of our connection out in Azure.
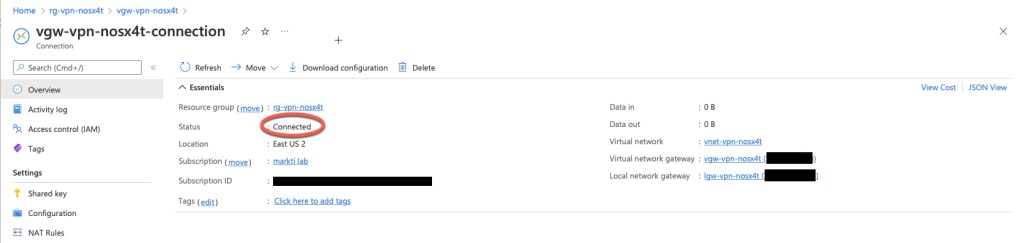
If all went according to plan we should see “Connected” as the status.