Enable Swagger to authenticate against Azure AD (Revised)
I’ve been hankering to enable my Azure AD protected WebAPI to be manually testable using Swagger UI. In order to do that, I need Swagger UI to authenticate against Azure Active Directory and make calls to my Azure-AD protected WebAPI. I’ve had to take a step back as my first attempt to do it with ASP.NET Core + Azure AD B2C failed. So my first step is to get it working with “classic” ASP.NET and ‘regular’ Azure AD.
I was following this post. However, as you’ll notice it’s a bit dated. It’s using the old Azure Portal and some things have changed.
First things first, an inventory of our ingredients to make this work:
Azure Active Directory Tenant Application Registration in Azure AD for your WebAPI (Application type ‘Web App / API’) Application Registration in Azure AD for your Swagger Web Site (Application type ‘Web App / API’) Delegated Permissions for your Swagger Web Site to ‘Access’ your WebAPI API Access Key generated for your Swagger Web Site’s Azure AD Application Registration Set the Reply URL for the Swagger Web Site Enable OAuth2 Implicit Flow on your Swagger Web Site’s Azure AD Application Registration Update Required Permissions for the WebAPI App Registration Update EnableSwagger with OAuth2 Configuration Add Operation Filter to attach the OAuth2 Security Requirement Update Swagger UI with OAuth2 Support Decorate Controller Actions with [Authorize]
In this walk through I will be setting up Azure AD Application Registrations with the following names:
My WebAPI will have an App Registration called ‘WebSwaggerCoreAAD’ My Swagger Web Site will have an App Registration called ‘WebSwaggerCoreAAD_Client’
Its important for you to know this correlation so that it’s easier for you to track what’s going on in the screenshots I’ve attached to this blog post.
I’m going to assume you already have an Azure Active Directory Tenant and an Application Registration for your Web API (hint, you do if you followed the wizard when creating your Web API project and selected your Azure Active Directory Tenant when it asked you if you wanted Authentication setup).
That means we will start with:
Step #3: Application Registration for your Swagger Web Site
Create a new Application for Swagger Web Site. It has to be a Web App / Web API because you are going to need to issue a client credential (key) for it.
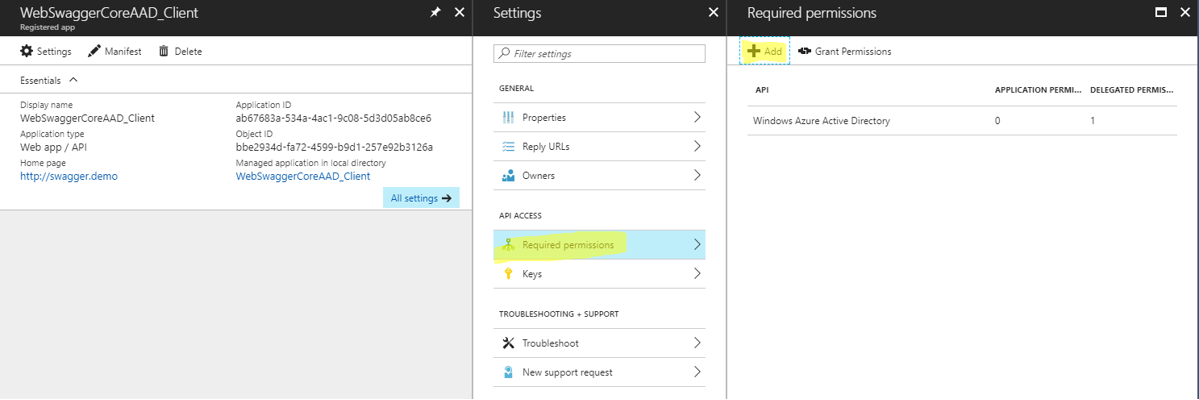
Step #4: Delegated Permissions for your Swagger Web Site to ‘Access’ your WebAPI
Notice we are editing the ‘WebSwaggerCoreAAD_Client’ Application Registration from the Azure Active Directory portal. As you will recall, this is the App Registration for my Swagger Web Site.
Add required permissions
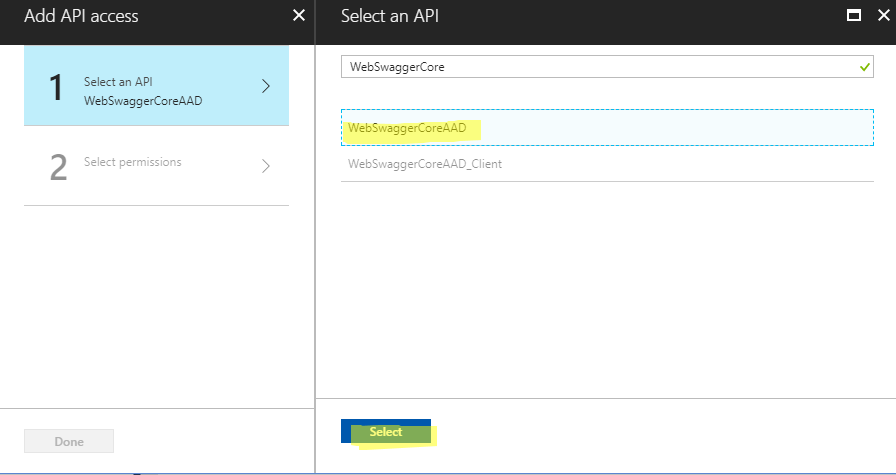
Select the application for your WebAPI.
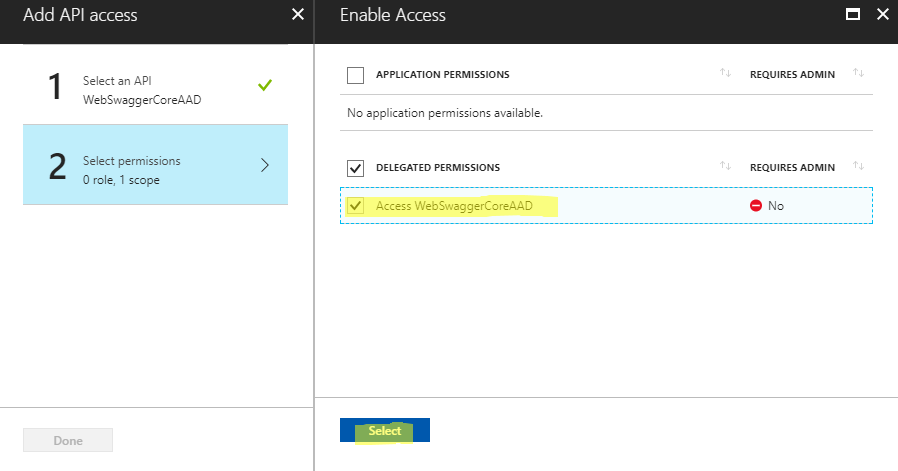
Select the ‘access’ permission
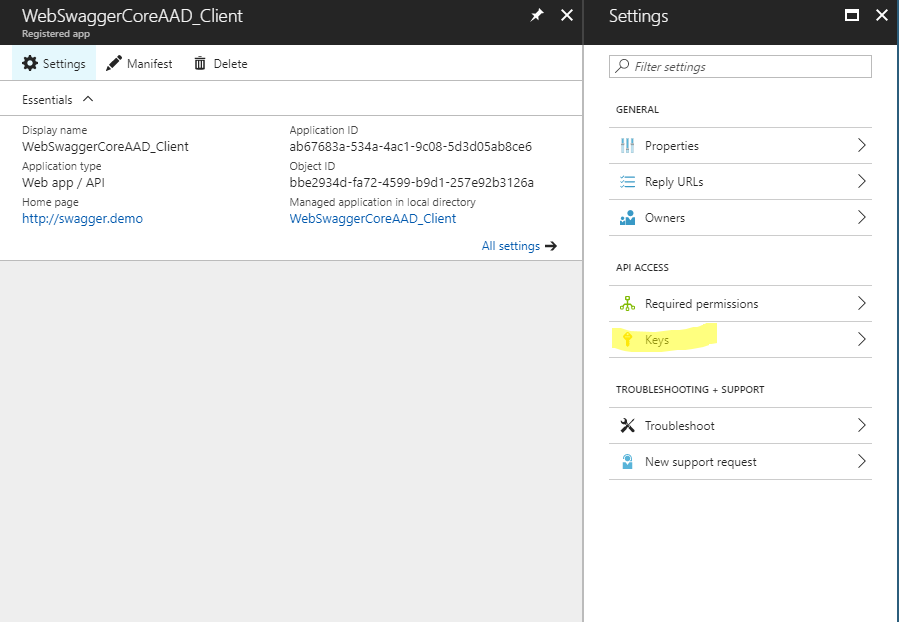
Step #5: API Access Key generated for your Swagger Web Site’s Azure AD Application Registration
Again, we are still in the ‘WebSwaggerCoreAAD_Client’ App Registration which is for my Swagger Web Site.
Now generate a new key…
Enter description, set expiration to NEVER
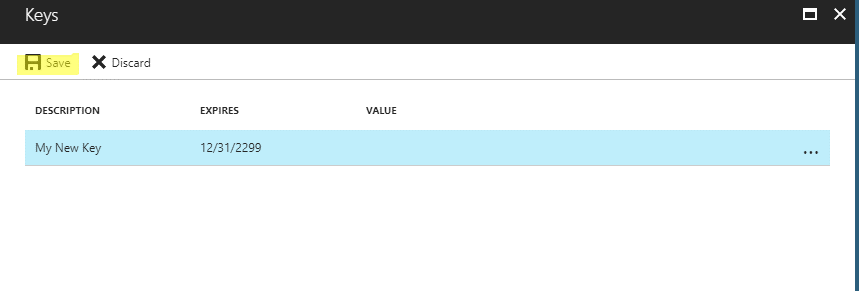
Press save and write down the key that is generated…
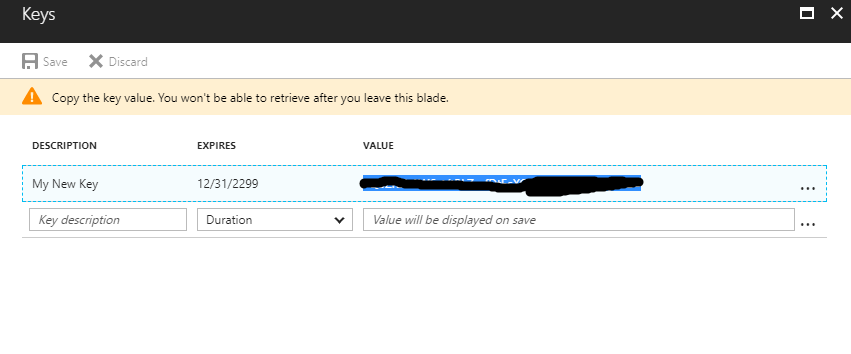
This will be later used as the CLIENT SECRET when configuring your Swagger OAuth configuration.
You’ll also need the ‘Application ID’ so go to the properties of the Swagger Web Site (i.e. ‘WebSwaggerCoreAAD_Client’ in this example) and grab the Application ID.
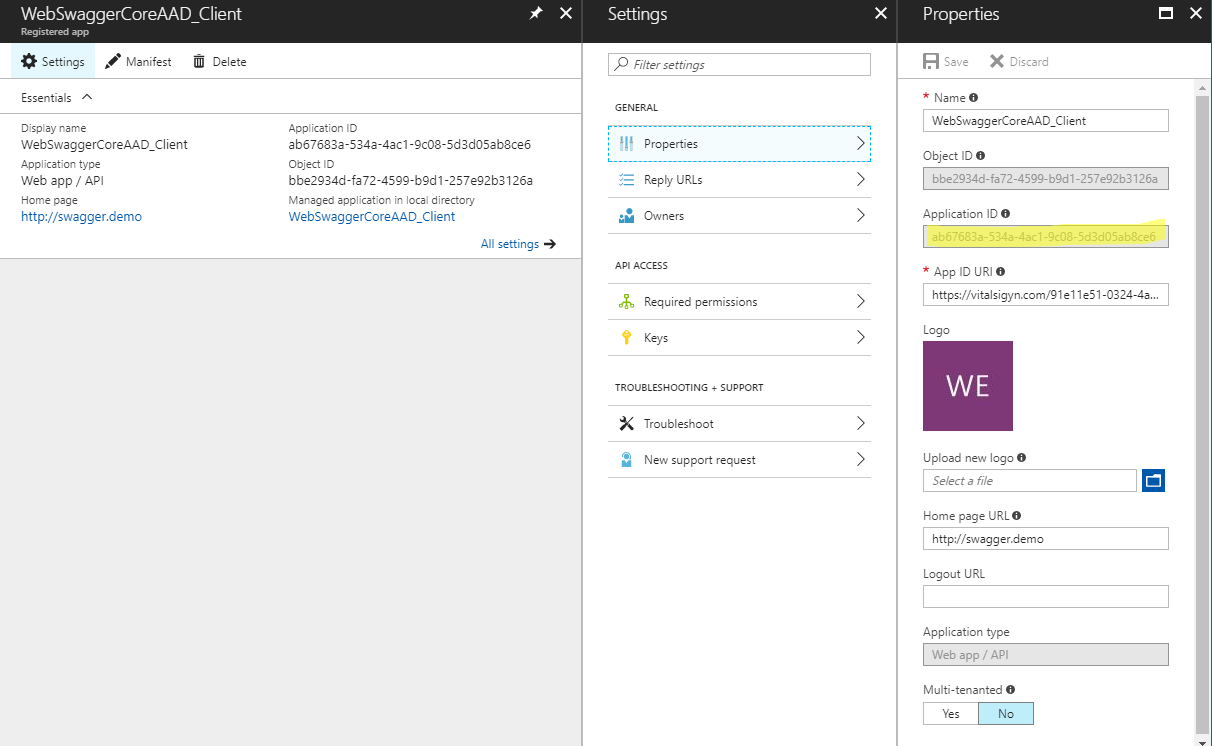
This will be later used as the CLIENT ID when configuring your Swagger OAuth configuration.
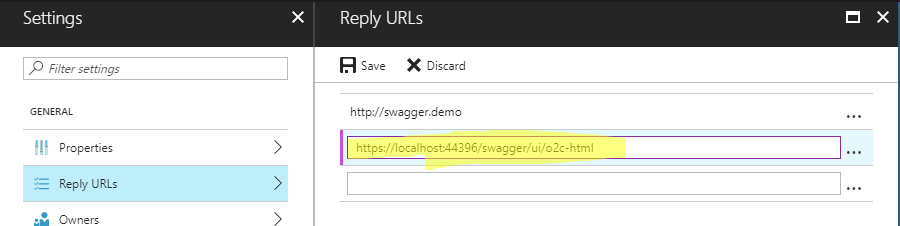
Step #6: Set the Reply URL for the Swagger Web Site
Since my Swagger Web Site is going to be hosted on the same server as my WebAPI, I’ll need to add a reply URL for the local address that your WebAPI deploys to by default…
In my case it is “https://localhost:44396/swagger”. Therefore, I will append “/ui/o2c-html” to the end of my URL and use that as a Reply URL for the Swagger Web Site App Registration (i.e. WebSwaggerCoreAAD_Client).
Here is the full Reply URL that I’ll add: https://localhost:44396/swagger/ui/o2c-html
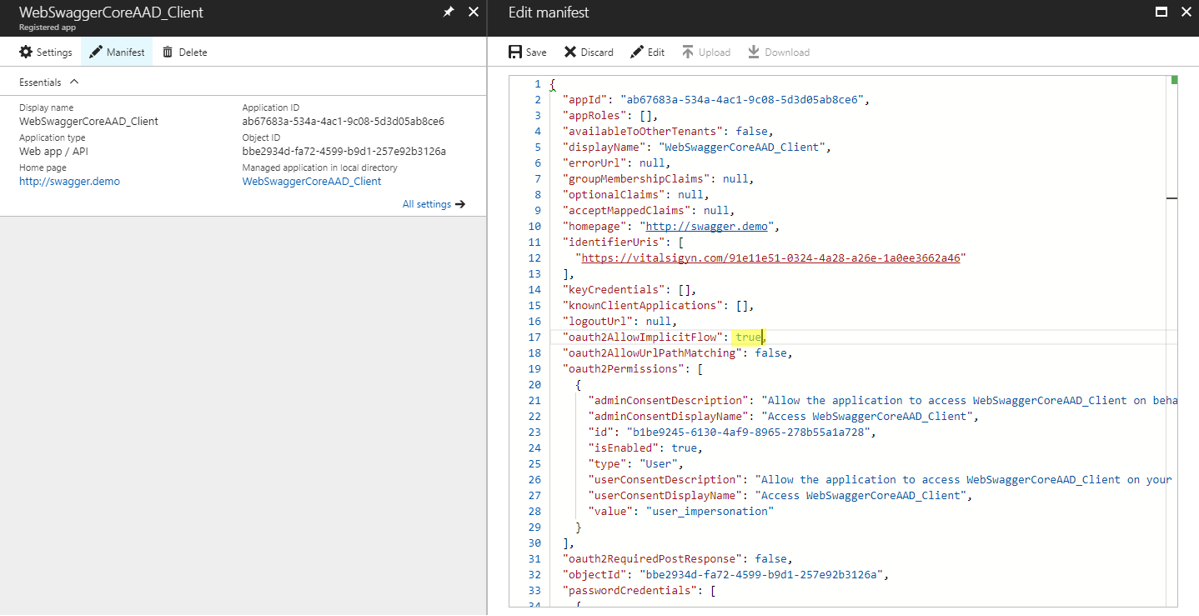
Step #7: Enable OAuth2 Implicit Flow on your Swagger Web Site’s Azure AD Application Registration
Edit the manifest
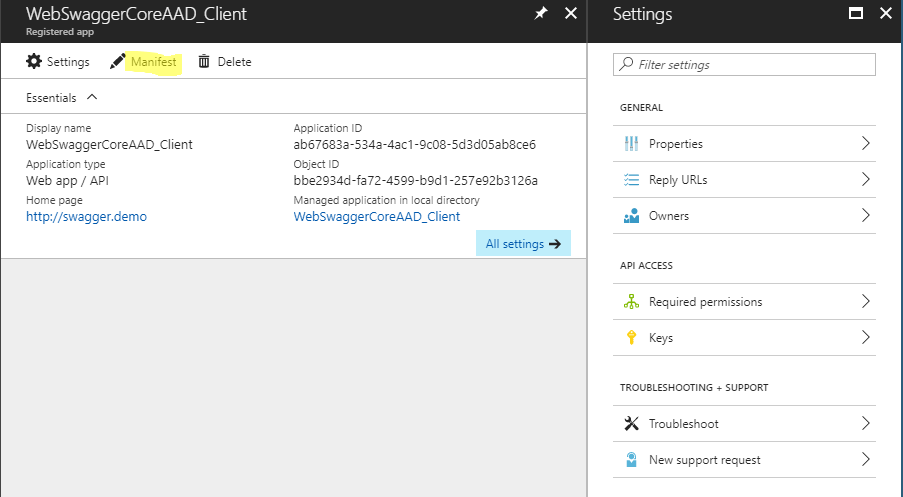
Change “oauth2AllowImplicitFlow” to “true”
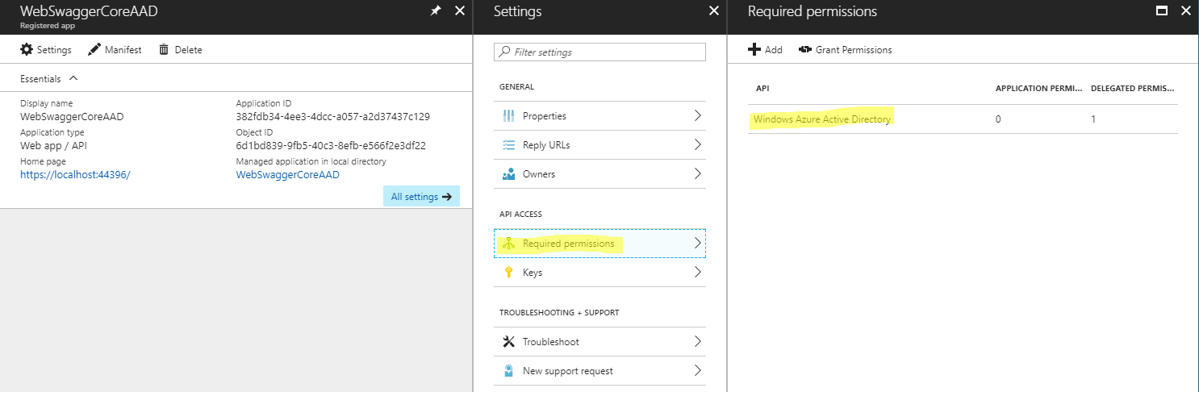
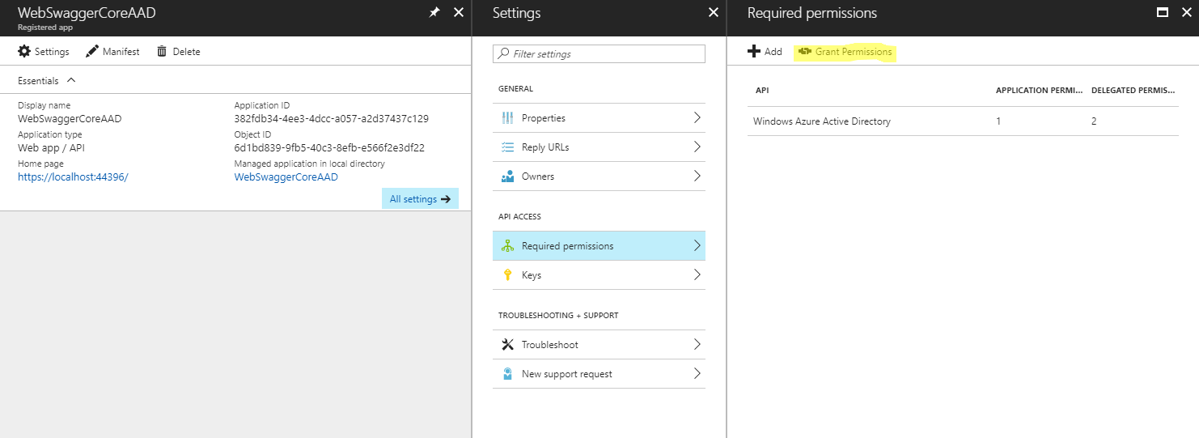
Step #8: Update Required Permissions for the WebAPI App Registration
OK, now we are going to leave the App Registration for the Swagger Web Site and visit our neglected friend the App Registration for the WebAPI.
We need to add some permissions to the WebAPI to make sure its useful. You can access it’s permissions by opening the ‘Required permissions’ section and then selected ‘Windows Azure [sic] Active Directory’.
Check to make sure the following are selected:
- Application Permissions
- Read directory data
- Delegated Permissions
- Read directory data
- Sign in and read user profile (should be checked by default)
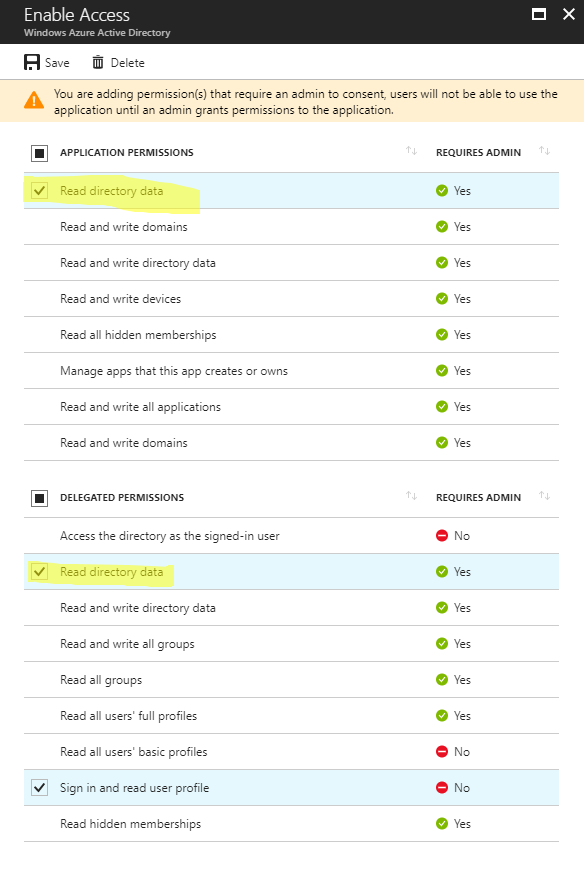
Click ‘grant permissions’
I think this makes the changes ‘in force’ but I could be wrong…
While we’re still in the WebAPI’s App Registration let’s grab the ‘App ID URI’ from the WebAPI app.
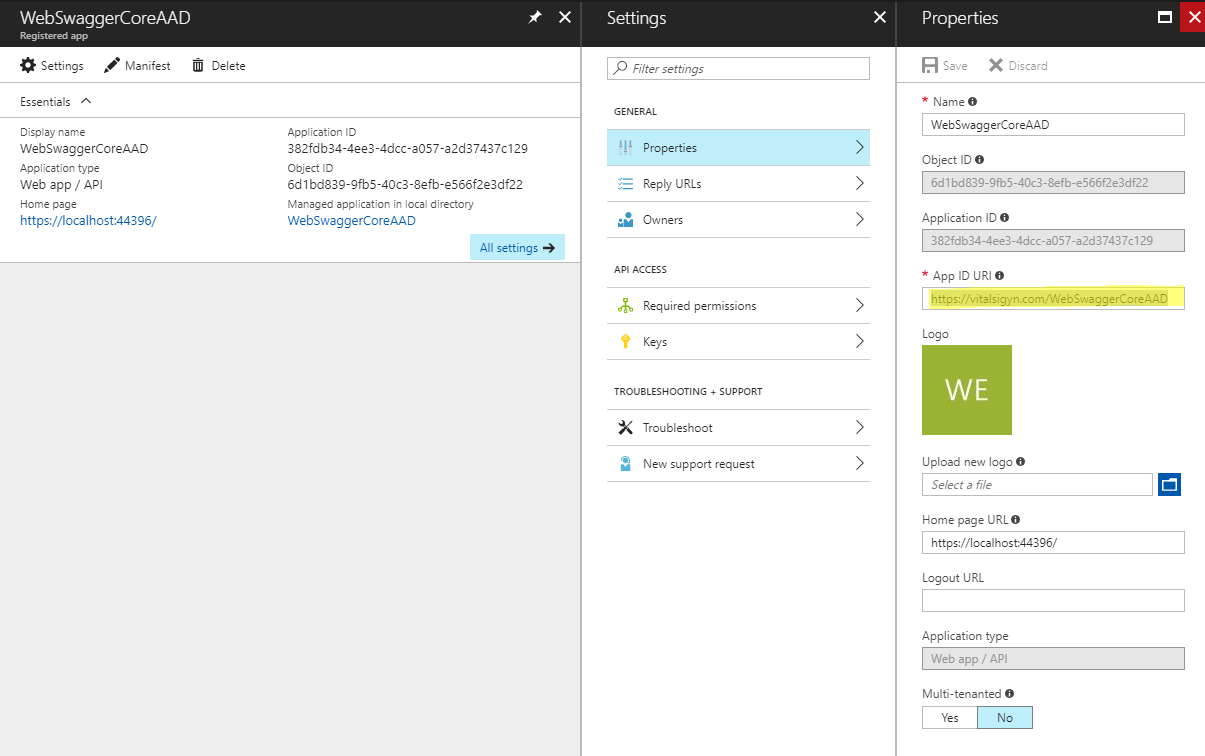
Use this as your RESOURCE / audience.
Step #9: Update EnableSwagger with OAuth2 Configuration
- Description: meaningless meta. Consider this a creative writing exercise.
- Flow: implicit is a magic string. Remember when we explicitly enabled the ‘implicit’ flow by editing the App Registrations Manifest? This is why.
- Authorization URL: This is a tenant endpoint. The GUID is your tenant’s GUID. Make sure the endpoint follows the ‘https://login.windows.net/TENANT_GUID/oauth2/authorize’ template. I botched the job by accidentally having the ‘token’ instead of ‘authorize’. The do fundamentally two different things.
- Scope: user_impersonation is a magic string. ‘Access blah blah blah’ is meaningless meta. More creative writing.

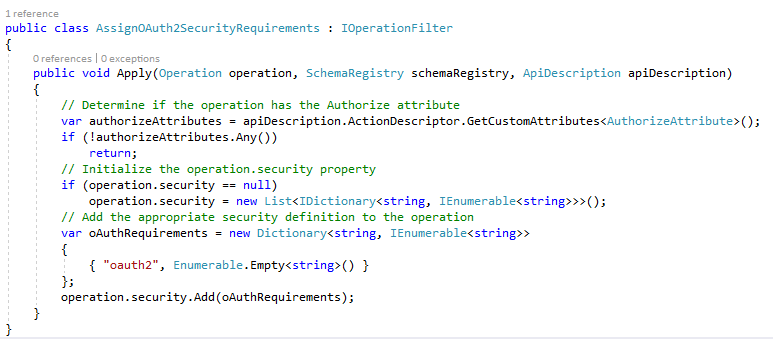
Step #10: Add Operation Filter to attach the OAuth2 Security Requirement

You will need this class in your project as well to make it all work:
Step #11: Update Swagger UI with OAuth2 Support
- Client ID: ‘Application ID’ for the Swagger Web Site’s App Registration
- Client Secret: Access Key we generated for the Swagger Web Site’s App Registration
- realm: Reply URL for the Swagger Web Site
- appName: Creative Writing exercise
- additionalQueryStringParams[“resource”]: Application URI ID for the WebAPI’s App Registration.

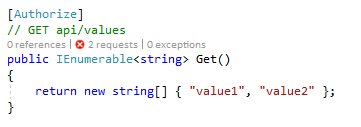
Step #12: Decorate Controller Actions with [Authorize]
Now this is more of a limitation of our Operation Filter that we used in Step #10 but we’ll do it anyway. We need to decorate all of our WebAPI actions with the Authorize Attribute.
WRAP UP
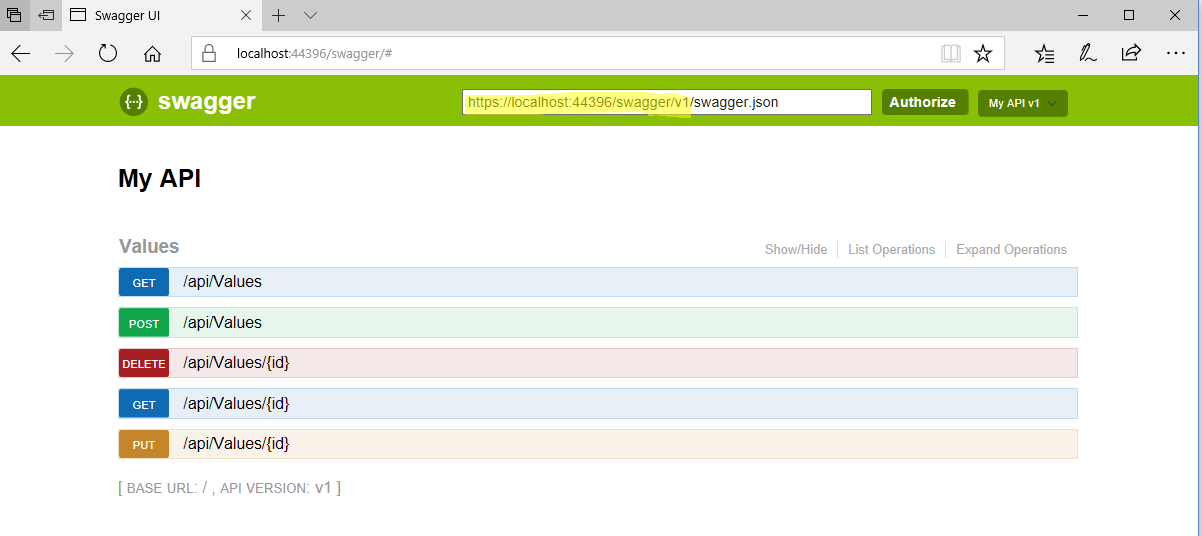
After we have done all these steps now when we debug our WebAPI and navigate to our Swagger UI endpoint it will look a bit different.
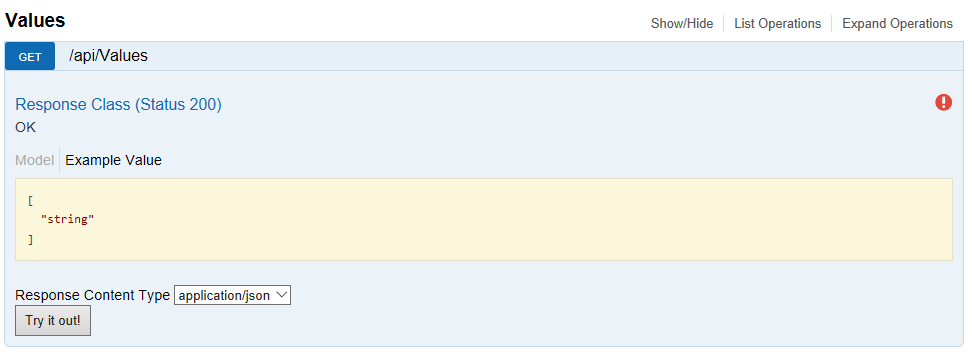
We will see this red exclamation points in the upper right.
If we ‘Try it out’ we will get the following error:
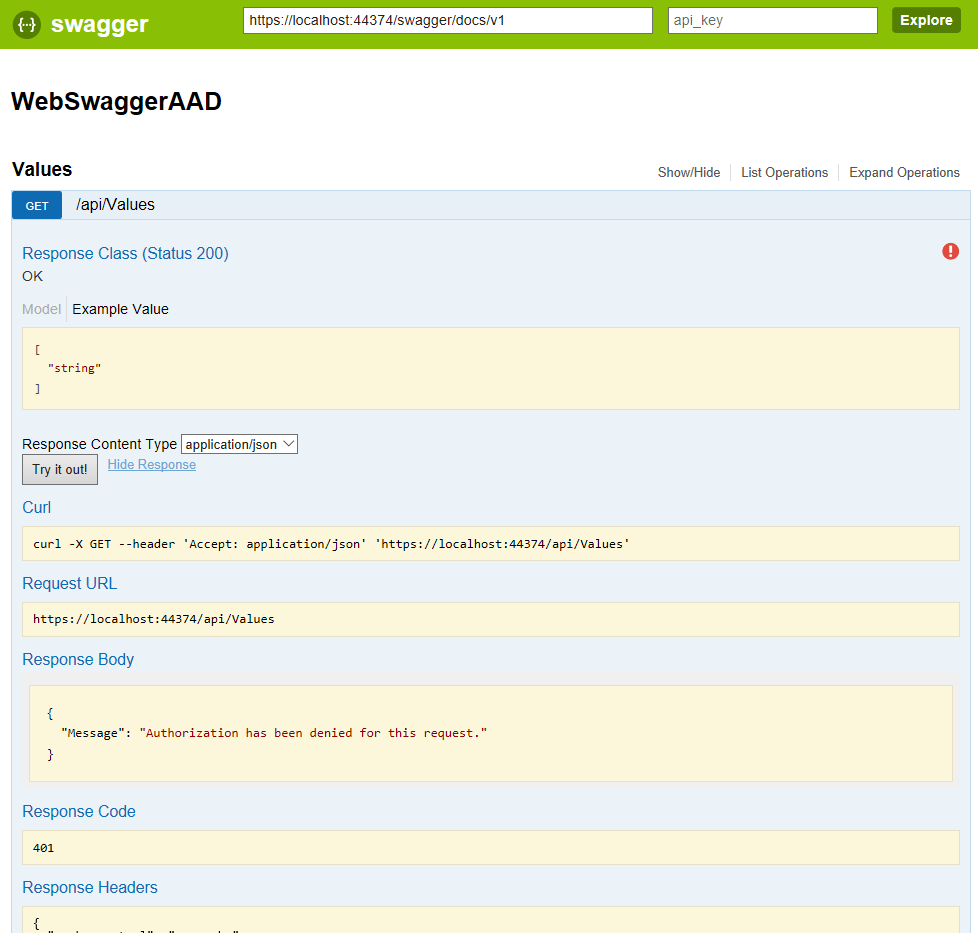
That’s because we haven’t authenticated yet.
We need to click the little exclamation point. Then we’ll see this dialog:
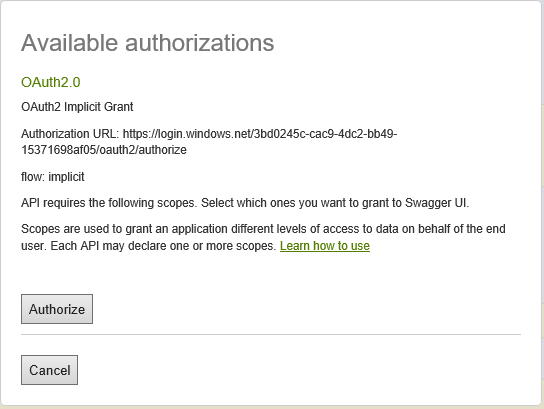
Clicking the ‘Authorize’ button will initiate an ‘implicit’ flow which will redirect us to Azure Active Directory to login and then back to the Swagger UI page when we’re authenticated.
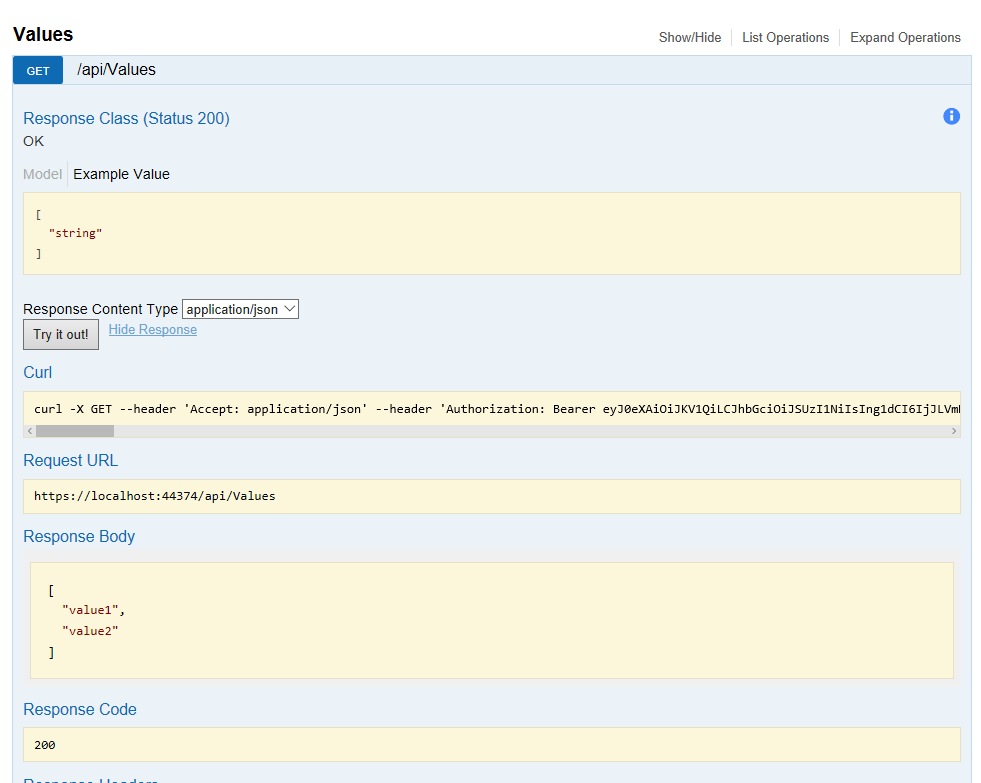
Clicking ‘Try it now’ again will produce the desired result:
I’ll post a follow up after I get it working with ASP.NET Core. :o)
DONE